• Hello there guest and Welcome to Fox Body Mustangs forum, This forum is intended to be used by enthusiasts of the Fox body Ford Mustangs (1979-1993)!
    To gain full access you must Register. Registration is free and it takes only a few moments to complete.
    Already a member? Login here then!

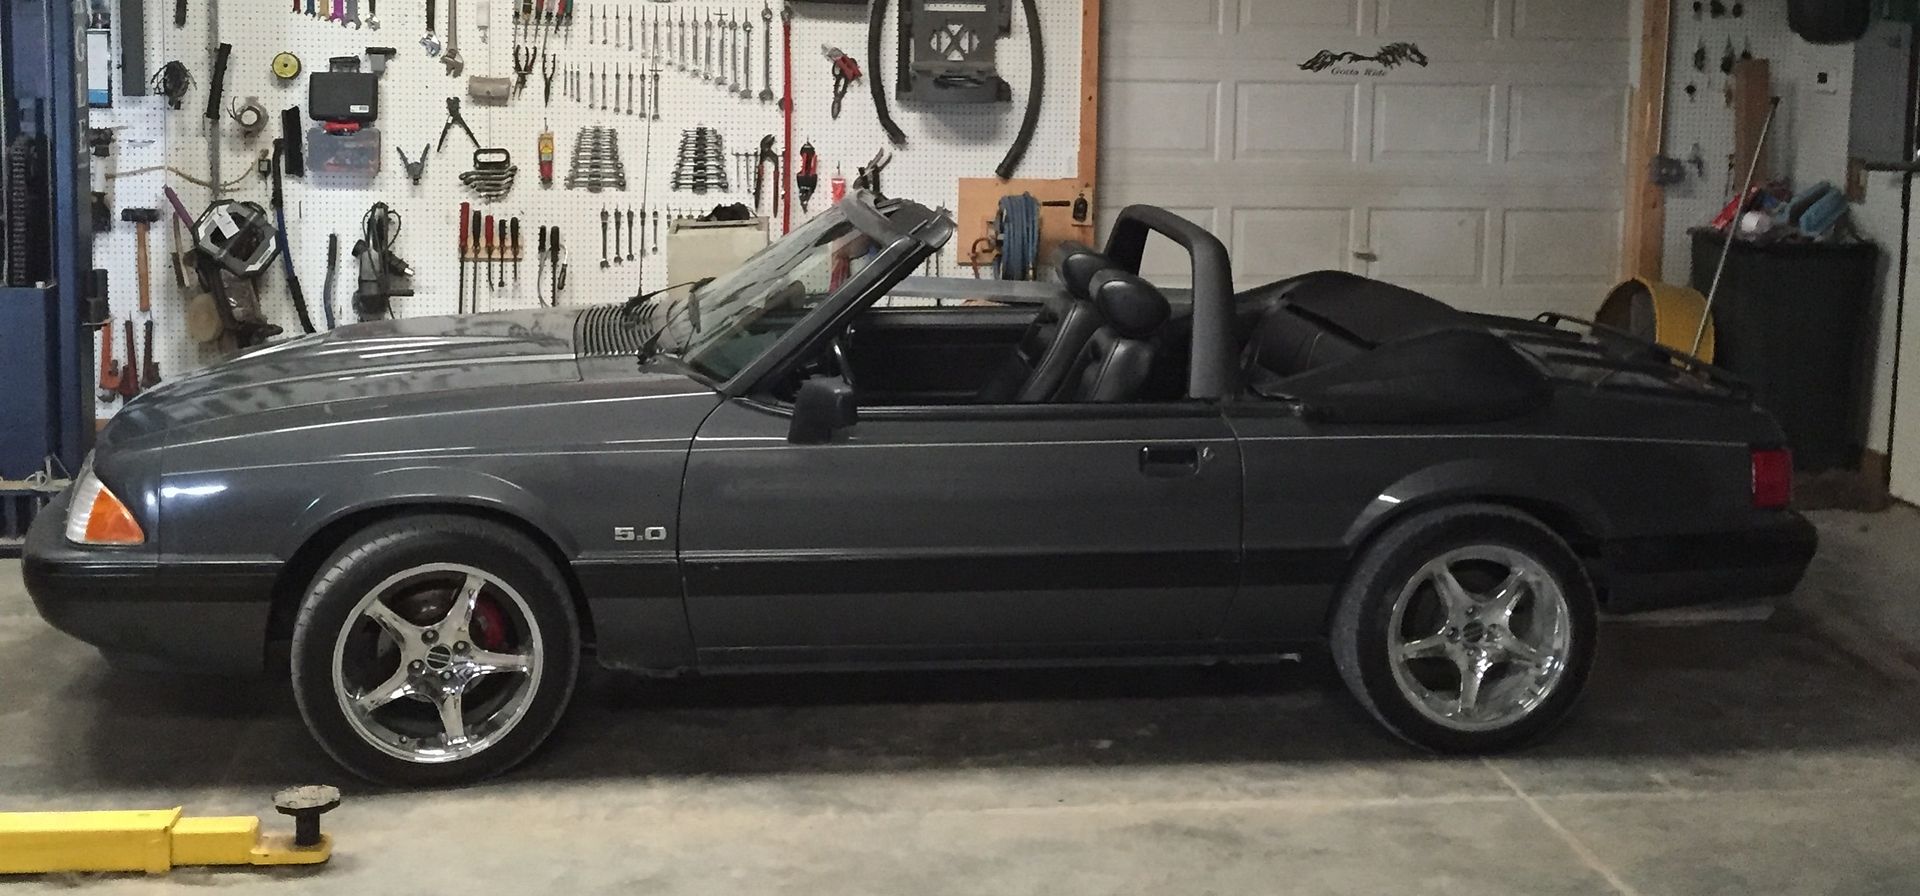
89 lx convertible summer driver project.

John2002

Guest
LOL...That looks like a prize on The Price Is Right!!!!. You and a guest can stay 5 days 6 nights at this all inclusive resort. Beautiful sand beaches, oceanfront room leading to tranquil palm tree gardens that make you feel like your on your own deserted island.... all this can be yours if....The Price Is Right!!!! Any Golf with that????
 

mustanggarage

Active Member
I don't golf but there is a world class golf course here. I get to stay a few more days. have to fly back tuesday. I am not looking forward to that flight, but I am looking forward to getting the stang working again. although when I left there was a foot of snow or more on the ground so i am not going to be driving it till that goes away anyway lol.
 

John2002

Guest
Its supposed to drop below freezing here again this weekend... I won't even get a chance to work on it being that cold...Still a month out for me to get the wheels back on the ground....
 

mustanggarage

Active Member
I am back home from my very arduous week of work. going to a conference in Kauai. Seriously I worked very hard, ok I worked a little and had a lot of fun and sun and now I am freezing lol. anyway I am back to work on the transmission. So after we got the center support in on that last picture we put in the forward sungear with its torrington bearing. that is the bearing that was destroyed when I took it apart.


then the sun gear shell and its bearing
.
after that you install the overdrive band, and then the reverse clutch assembly. this is an area where we did some improving. this groove is where a snap ring resides. it is frequently broken on these aod's and the snap ring off in the aod. this snap ring holds the roller clutch assmebly in place. the monster transmission kit and indeed most high performance rebuilds recommend replacing that snap ring with a spiral snapring and lock. fortunately my snap ring groove was in good condition.


this is the original snap ring.


and the replacement.


so once that is installed and seated the second gear pressure plate, clutches, and steels are installed. this brings the case almost all the way up to the top. next we have to install the front pump. since I was not sure if I damaged the front pump when my seal leaked I had planned to just replace the pump and seal so I found a n.o.s. front pump on ebay complete with new seal I installed the sealing rings and the piston with new lip seals and the set the total end play. we struggled with this a bit. the way you do it is once you have the main transmission assembled you take the front pump and install it with the original thrust washer and no square cut gasket then tighten two bolts and then place a vice grip on the shaft flat at the base and press up on the tailshaft then slip a feeler gauge beneath the vice grip. it should be between .020 and .045 inches. mine measures between .025 and .030 so it is good with the thrust washer I am using. if it is not you have to use a different thickness of thrust washer. and the monster kit comes with a selection.


the top one is the one that was in the transmission,


next the monster kit comes with a new A plus overdrive servo that is also an upgrade over stock.


I also ordered a hardened input shaft and it should be here soon but UPS is having weather issues lol.

next step is to install the governer and the valve body.
 

mustanggarage

Active Member
yeah what can I say one of the top names in my profession puts on a symposium once a year and it happens to be in Kauai every third year, since that is my wife and daughters absolute favorite place in the world to visit so heck yes I go to it when I can. I may not be the sharpest tool in the shed but I am not stupid enough to pass that chance up lol.

but to finish up the transmission for tonight.

after putting the overdrive servo, 2,3 accumulator and reverse band servo in it is time to install the valve body. this is another area I decided to improve. I bought a tci constant pressure valve body. this takes a lot of the stress out of getting the tv cable adjusted properly. it is still important to adjust it right but it if it is not adjusted right it will shift poorly not destroy the transmission so a big improvement in my mind. it also has a shift improvement kit in it so it should hold better and improve durability. the only difference in installing it is that the tv return spring is not engaged in the separator plate like it is in a normal valve body installation. Other than that is what it says in the instructions I don't know why.

install the eight short bolts in the position you took them out to locate the valve body. then install the long bolts. torque them all to 90 inch pounds. (this is a great opportunity to use my Dad's snap on inch pound torque wrench. I have a craftsman but that snap on is just so nice. yes I am a tool nerd)


this is how the shift selector and tv arm fit.


also if you ever have the valve body out for some reason I highly suggest you replace the selector arm seals. with the valve body out it is easy to do, if you blow the picture up you can see that little roll pin right near the selector arm. pull that out with a small pair of side cutters and remove the nut locking the tv rooster comb on the shaft and both arms come out. there is a seal on both the pan and inside the bore of the shift selector. I forgot to replace those on my daughters car and had to pull the pan back off and do it later because sure as heck it started leaking.


after the valve body is of course a new filter and new filter gaskets
then a new summit chrome drain pain with a drain plug so next time I pull this stupid trans I can drain the fluid through that. although with my lift funnel and transmission drain pain it is not to bad anyway.


after the drain pan you need to dissassemble the governor and clean it with carb cleaner.

until the plunger moves freely and it is very clean and without burrs. then reassemble and install on the tail shaft use petroleum jelly to hold the little ball in place. reinstall the snap ring and put the tailshaft back on. this is just on for the picture. I still need to replace the bushing and seal in the tailshaft but I am going to wait until Dad comes over. he is really good at bushing replacement so I will leave that job for him. lol.


so the transmission is basically done. Installing the torque convertor is really critical on this transmission I have learned it is easy to do wrong. I test fit the torque convertor by first lubricating the seal and the shaft of the torque convertor then installing it and measuring it to make sure it is fully seated. since someone mentioned how important that is on another thread I did a video on how it goes on. I hate videoing myself I feel stupid so I look even more stupid and awkward than I really am but it gets the salient points across.


mustanggarage

Active Member
wow what happened to the site? it is all different.


oh well. Like they said in basic training, improvise adapt and overcome.

so on with more fun with the transmission. Dad did not feel like putting the bushing in last night, he was pretty tired so I removed the old seal and bushing and hopefully tomorrow I will get that pressed in. but my new input shaft came today.

the old one is on the right the new hardened shaft is on the left.


after lubing and installing the new shaft and verifying that everything turned easily, I poured a quart of atf in the new torque converter and put it on.


again I measured with a straight edge and caliper and with the new input shaft I get a bit more clearance which is good I am at about a 1/10 over an inch.


I had to ask my daughters boyfriend to help me lift the transmission up on to my 100 dollar transmission jack I bought off amazon. I always wanted one of these and it has been very helpful.


I used some left over carpet to protect it.

next I put my drain pan back under the car and flushed the cooler lines with a whole can of carburetor cleaner


this is what came out of it. I guess this is why you are supposed to flush those lines when you do this.


ok. now I am ready to lift the transmission up in place. since I am by myself I get everything I think I am going to need ready. I have done this several times now so I know exactly what I need, and I have figured out what works for me.


the only bad thing about that jack is it doesn't go up quite high enough so I have to have a rolling stool to sit on while I jockey the transmission into place.


this is my bell housing bolt installation tool. a single extension that long won't work it needs the articulation of the multiple extensions, you need the short socket and swivel extension on the end and with it you can put all the bellhousing bolts in in no time with minimal effort. that puts the ratchet out past the tailshaft so it is really easy to tighten the bolts.


once I have everything ready, I slide the transmission up, jacking it to the right height and carefully moving it closer to the engine. align the flexplate with the torque converter studs.


once the torque convertor bolts are aligned I slide the transmission onto the alignment dowels making sure to go straight on. with the trans jack you can easily set the angle so that it just slips on piece of cake. once the dowels are engaged I start the two lower bellhousing bolts and run them in a ways by hand. then go back behind the trans and push it onto the dowels I don't use the bolts to pull it on. once the transmission is up tight to the bell housing I check the torque converter to make sure it is free, then tighten those two bolts. then I check the torque converter again. here is another quick stupid video to show how I think the torque converter should be at this point.


then I install all four torque converter nuts loosely turning the engine over by the harmonic balancer bolt. once all four are started I slide the torque converter forward by putting a short pry bar in through the starter hole. once the torque converter is all the way against the flex plate (it only moves about a 1/8 inch or so) then I tightened the torque converter bolts in a crosswise fashion in steps until tight. these are of course new nylock converter nuts.

then on the passenger side you can reach up and start one of the bellhousing bolts in the hole above the starter and tighten it down. then drop the jack to give you some clearance for the rest of the bolts. the t-v cable retaining bracket is bolted to the top passenger side hole. I leave this one until last so you can move that cable out of the way for the drivers side bolts. I have two ground straps that go behind the top drivers side bellhousing bolt. once all the bolts are in and tight I remove the jack to make it easier to work around.

I stopped there. I should have put the starter in, but that is a pain and I don't feel like it tonight lol. I will try to get that done tomorrow.


I know most people on here are not fond of automatic transmissions so most of the tech is related to manual transmissions, so I am trying to put some of what I learned during this process about the automatics on here. for me and for a lot of other people an automatic is nice for lots of reasons. this is a daily driver for me so being able to drive without having to shift is useful particularly when there are fair number of hills. it is not quite as bad nowadays with blue tooth stereo but it still makes it easier for a daily driver. And I already have my 65 with that has a 5 speed if I want to drive a manual hot rod. And finally my wife and daughter do not want to learn to drive a manual and this car was my daughters back up when I was working on the jeep last year. she is kind of afraid to drive her 67 to school because several cars got keyed last year including one of the teachers.

I am justifying this right now because I strongly considered doing a 5 speed swap instead of rebuilding this transmission and in fact I almost did but finally decided to keep the automatic.

I have to work all weekend but hopefully I will get time to finish it up soon. my dyno day is coming up soon and I really want to test drive it a bit before I try to dyno it.
 

John2002

Guest
I've used that long azz socket extension trick in my garage too, but mine had a lot of duct tape wrapped around then ends.
 

mustanggarage

Active Member
@mustanggarage very nice write ups.. When I tear into my AOD Im looking for you:)


sounds good. this is my second one and it seems a lot easier this time lol.

and now to finish up the install.

I got impatient waiting for Dad to come over so I decided to man up and press the bushing into the tail shaft myself. I stuck it in the freezer for about an hour then using dads cam bearing installation tool I set it up in my press. I bought this press from harbor freight for about 100 bucks shipped to my house.


I bought it when we were doing the ring and pinion swap and rebuilding the differential a couple years ago. I decided rather than spend the 400 dollars it would cost to have someone else swap the gears I would buy this cheapo press and see if we could make it do the job. surprisingly it worked fine. yes it is cheap, no it is not heavy duty or of high quality, but heck it works. after buying it I also used it to swap ujoints in my old yj. so I have gotten my moneys worth out of it, and it came in handy again. I set the tail shaft up in the press, and pressed it in, in less than a minute. easy peazy.


the only important thing is to make sure the oil feed hole is lined up properly.


then I used a big socket to press the seal on.


new gasket and bolt it up.

then I finished up everything else. the starter. I finally figured out if I use a wobble extension and my long extension I can go in over the motor mount to tighten that top starter bolt. next time I have to take that out it will be easier.

and John my Dad has an old wobble extension that he has used for years and I had tried to use it but it is worn out and I had to tape the socket and stuff together like you said finally I was at o'reillys the other day and found that long extension and a new wobble extension. they were not very expensive and considering the aggravation I have been having for years every time I try to use dad's wobble extension it was well worth it.


I still have not figured out an easy way to install that stupid h pipe. that thing is a booger. I have it in, the shifter and tv bracket bolted up, drive shaft, o2 sensors everything. then I got my MAF back from Pro M. they said they had to flow it again to get me the transfer sheet,

oh and Kev they put the screen back in it, they said that having the screen out would somehow mess up the reading. any way I installed that and my new bbk cold air intake. my old cold air intake was really scratched up, and this one has blue so it matches lol.


I also put in a transmission cooler. that goes in by basically cutting the return transmission line with a tubing cutter. it is the line coming out of the bottom hole in the AOD and going into the bottom hole in the radiator. I cut it, used my new double flare tubing flare tool for the first time, attached the two rubber hoses and mounted the cooler low on the radiator in front of the ac condensor.

then I added 4 quarts of atf started the car for a couple seconds. it fired right up again btw (I have to admit I was nervous to try it after all this.) then added 4 more quarts, started it again and put it reverse on the lift and let it run for a couple seconds then neutral and put the brakes on, shift to drive let it run a few seconds, neutral, brake and park. check fluid level added 3 more quarts of atf and it looks like it is full right now. I will have to get it out on the road soon and drive it a bit and check it again.

I have no fluid leaks at this time, but I have a nasty exhaust leak from that stupid passenger side collector. I am going to try to get that fixed tomorrow. Dad says he can get it we will see.

anyway everything seems to be working right. I am now ready to put the hood back on if I can get someone to give me a hand in the next day or so lol. I am tired tonight though so I am quitting for the night. if that stupid exhaust leak gives me too much trouble I am seriosly considering cutting it out with a sawzall and getting an offroad pipe. at least then the stupid catalytic convertors won't be in the way. lol.
 

mustanggarage

Active Member
ok I have been working a lot and had a few small issues. I had to cancel my dyno session and I have not rescheduled it yet. it turns out when the transmission crapped out I must have got some trash in the governor because I was having some shifting issues. I tried everything I could think of to fix it. finally had to replace the governor. it is now working. tonight I made one more small adjustment to the t-v cable and it feels like it is shifting like I want it to now. I had to adjust the idle a bit more also. I took it for a nice long drive and it feels good. it has really good seat of the pants acceleration, the transmission shifts strong but not too violently. it idles good, no surging or anything. overall it feels great. the check engine light is coming on. I took it to a guy here in town that I have had work on my truck a few times. he is really good with fuel injection. he says that it is just needing the computer tuned but it is running fine. the check engine light goes off when you shut it off and comes back on after about 15 minutes. but it is not reading lean or anything so I think I will drive it a bit more, change the oil when I get it to 100 miles and then try to find time to get it to the dyno.

I bought some new carpet for the trunk. the old stuff was looking almost as bad as the front did before I replaced it.


I got this bag from Ron Bramlett of mustangs plus. He and his family are really great people. I met them at a car show in Utah several years ago and have kept in touch ever since. He heard that I could not go on the 50th anniversary pony cruise he was helping to organize, because of work, so He sent me one of the goody bags. I will use it for organizing cleaning supplies. it is perfect, you can even fit a california duster in there.


and on a side note I got a new garage buddy a couple weeks ago. one of my friends at work wanted to find a home for him because he kept eating her chickens lol. so now he is my constant shadow. He is a 7 month old AKC registered German shepherd pup named Ozzie. short for Mister Royal Osborne. My friends are fanatic Nebraska cornhusker fans lol.


mustanggarage

Active Member
I have my dyno time re-scheduled for june 6. man my schedule sucks these days. everytime I can get a day off I have to do something else. It will be 3 months since I finished the engine before I get it over there. oh well. it is running pretty well already so it's not like it is just sitting here waiting. and it has been raining so much I really haven't felt like getting it out to much yet anyway.

since I am waiting I bought myself a couple birthday presents. first I have been slowly doing a conversion to black on the interior and I bought some new door panels and repainted the kickpanels and arm rests with krylon fusion paint. new arm rest pads and door latch and window switch bezels complete the door panel conversion.


I also added the pony door lights just for fun. I think they are kind of cool and the kids love em so whatever.

then I had planned to find some black rear quarters as well and I have been looking for a long time for some good 90-93 versions because they are a lot easier to do the styling bar conversion and the seat belts work better. also they mount the speakers higher so they are above the seat so hopefully they will work better as well. anyway I had been looking on ebay for months now and they seem to be rarer than hen's teeth. finding a good set that is not all broken is virtually impossible, I was beginning to think. I found some a while back but they had been painted and were a gloss black and really did not match so I ended up just modifying the ones in the car. anyway the other day I found some on ebay. they were the best looking pair I had ever seen on ebay. these were also the first pair I had seen that had the window switches in the door. so I watched them and they looked like they were going to go for a reasonable amount so I waited until the last 20 seconds and bid. I really wanted them so I bid 500.00 I unfortunately was so excited I dropped the stupid period so I ended up bidding 5000.00 lol. fortunately they ended up going for 385.00 still a lot of money for quarter panels but these are in great shape, and very difficult to find.


mustanggarage

Active Member
more fun fixing stuff I did not want to have to fix this weekend. I was hoping to get this thing all buttoned up by next weekend so I could just drive it for awhile. So I was working on swapping the interior quarter panels I had it pretty much swapped out when I decided to test the rear windows. they had always worked before, admittedly they were kind of jerky but they always went up and down, but when I tried to roll them up the drivers side started skipping and popping and the passenger side moved a bit and then stopped. I could not figure out how swapping the quarter panels could have affected the windows but I pulled them back out again and checked things over. they still wouldn't work so I pulled the motors off and sure as heck both of them were skipping and the passenger side would hardly work at all so now it looks like I am going to get to swap those out. I have no idea why they decided to go out now unless it had to do with having the quarter panels off and allowing more dust and crap to get in. but anyway since I am going to fix that I put the quarter panel swap on hold and decided to do a complete rebuild on the quarter windows so I bought the kit from late model resto shown in the thumbnail, and I also bought some 1990 style black seat belts off ebay to go with the new quarter panels they will work a lot better than mine currently do with the new quarter panels and they are currently grey so they should look better too. it is a serious pain in the but to get the window regulator out but I got the drivers side apart last night and cleaned it really well. at first it would hardly move but after I got it cleaned up it slides much better. I also had to sand down the rails on the regulator because they were rough for some reason and the regulator kept binding there. anyway this one works much better. I will lubricate them with some lithium grease when I get ready to reinstall everything. there is a pretty decent video on the late model resto site that details how to do this, but I am still only going to take one side apart at a time. I also found that the rear quarter window switches are different of course, but the terminal connectors are the same so I was able to pop the terminals out of the old switch and into the new one without cutting and splicing. of note the old switch has six lugs on it and the new one only had 5 so I am going to have to spend some time once I get everything back together making sure I get that switch wired up correctly.

and finally the speakers in the 89 are round and the 90 are oval so I ordered some new rockford fosgate speakers to go in there and I repainted the speaker grills because they were kind of scuffed up.

then of course my oldest daughter who just won a gold medal in the special olympics wanted to sleep out in the garage with the dogs. she likes to do that, the garage is set up basically like a house so it is one of the few times she gets to feel independant. well anyway my oldest dog was getting upset because of the thunder so she decided to lock him in the bathroom. today I found a hole right through the wall next to the door where the dog clawed his way right through the sheetrock and out the other side. I came in and saw him laying on a blanket in the corner looking sheepish and surrounded by sheetrock dust. so today I got to fix that, yeah.
 

Attachments

  • lrs-23394c-kit_4269.jpg
    lrs-23394c-kit_4269.jpg
    14.9 KB · Views: 477

mustanggarage

Active Member
got the sheetrock and pegboard and insulation replaced on the bathroom. and put the first coat of joint compound on. and I am now sitting around waiting on parts lol. I have the new window motor kit coming and I also have the seat belts and a few other things coming. I spent some time looking over the windows. the regulators are just really gunked up. that is doubtless why the motors finally gave up. just too much effort required to move them up and down, and while it is easy to replace the motors getting the regulators out is a bit more difficult. I just took the drivers side out so far. here is a pic of what it looks like now.


in reading up on these fox body windows I learned that the plastic window guide rod mount commonly breaks and the window bushings frequently go bad so I decided to fix everything at once rather than have to tear it down again later. my guide rod mounts are not broken at present.


but it is obviously a lot easier to get them out with the regulator out of the way It would be possible to replace it without removing the regulator, but I think the main thing my car needs is to have those stupid regulators cleaned and lubricated. while I have that apart I will replace the bushings and clean everything up nicely. I also learned by watching the video on late model restoration how to adjust the rear windows. they always were out of adjustment, but I thought it was the door that was out of adjustment. anyway I will try to take some more pictures of the process once I get my parts. I hope to at least have the windows back together before I have to take it to the dyno shop friday.
 

mustanggarage

Active Member
surprisingly my seatbelts got here today. now I know the 89 and 90 seatbelts are a lot different and when I began looking online to see if anyone had done this swap I read that it is not possible so I got really concerned. fortunately the front seatbelts are not that different. I got the whole deal with the extension rod and mounting brace and test fit them tonight. they fit just fine and I only needed to drill one hole. and it looks like that hole is prepared. It looks like there is a punch out outline in the sheetmetal right where you need to drill the hole. so I mocked everything up and it is going to fit perfectly. Unfortunately the back seatbelts are not going to work without a lot more work because they have shoulder belts in the 90 and only lap belts in the 89. I would like to make it work so I may keep looking into it though.
 

mustanggarage

Active Member
the last few days I have worked pretty hard on the car. after getting off work I stayed up late working on the car. my shop is very nice for that I have plenty of lighting etc. so I can basically work whenever I have time. well I needed to take the car to the dyno shop today and I did not want to have to reschedule again so I worked on it all night last night. finally laid down on the couch out here at about 5:00 this morning. it is not done yet but it is back together enough to go to the dyno shop. I can finish the speaker install and work on that passenger rear window switch when I get it back.

ok. here is a brief rundown on what i have done since my last installment.

I mocked up the front seat belt install and studied the rear seatbelt installation. I decided it was possible to swap in the 90 rear seatbelts so I started on that.

first the way these seatbelts work is they install behind the rear seat and run up behind seat brace between the top well liner and the rear seat. in order to install them this area needed to be modified a bit.


those two flanges needed to be cut and bent out of the way in order to mount the seatbelt as far laterally as possible


then if you look closely you can see I drilled a hole for a 3/8 bolt into that brace behind the seat. I reinforced it by placing a large washer that came in another seatbelt install kit I had under the cross brace. I welded the bolt to that washer and bent up one edge to match the shape of the brace. that way it slid up under there and locked it self in place. it made it easier to tighten the nut down. I used a large washer and lock washer to finish it up. then the plastic sheath stuck up too high above the back seat and it caught when I tried to lower the seat. since the seat fits in this area there was enough space so I used a heat gun to heat up the plastic and allow the sheath to bend forward to contour along the top of the seat. it worked fine.


during this experiment I figured out why my top always went up and down crooked, and would not retract without pushing up on the top with my hand to get it started. it seems the little bracket that holds the passenger side hydraulic cylinder in place was missing. so I contacted prestige mustang and they overnighted me a replacement. my top now works better than it ever has.

ok. after getting that part figured out my window motors arrived and last night I worked all night on finishing that install.

first you have to remove these two nuts. I found out later it is also much easier if you remove the two nuts that hold the window to the guide rod and remove them seperately.


then you drill out the rivets and install the new billet guide rod support. and re install it. again it is easier if you remove the window, then you can install the guide rod and the bracket in one step. I figured that out for the second side.


then I replaced the plastic bushings on the window support and re installed the window. btw you need to leave those two nuts on the guide rod loose so you can adjust the window.


after that you finagle the regulator back in place, raise the window, adjust the position tighten the nuts.

then you swap the brackets from the old motors to the new ones and install them. run the window up and down several times and adjust the window. this took me quite a while. but once I was finally satisfied with the way the window worked I installed the new seat belts and the quarter panel. then discovered that the styling bar would not go in because the seat belt bracket needed to be modified. once I got that modified I installed the quarter panels loosely, installed the styling bar.


then since it was so late I decided to just button it up for now and finish the details later. I put the seat back in and put the speaker grills back on. took a couple pictures


and wiped the dust off the car and loaded it on the trailer. then I laid down for a couple hours on the couch and drove to des moines. and dropped it off at the dyno shop. finally after wanting to do that for about 3 months I finally got it over there. so now I wait for him to get it tuned and I will go pick it up tuesday. I can finish the rest of it up anytime. I now need to get a new tonneau cover for it as well.
 

mustanggarage

Active Member
finally after 3 months I got the car to the dyno for the switch chip and tune. It fought us every step of the way like usual. I overtightened the hose clamp on the fuel pump and it blew off during the first test drive. so when I went to pick it up it would not run. then the check engine light came on, bad o2 sensor. then the belt tensioning pulley seized up. finally after all that we got it on the trailer and I got it home. I took it for a nice long drive today and it is running great. tons of power, it is running smooth. I need to do a bit of work on the idle though. for some reason it idles right at 750 in park but when it is in gear and driving slow around town it wants to idle up to about 1100 so I end up riding the brake more than I like. the next chance I get I will do a base idle reset and check the tps voltage again. but overall I am very happy with how it is running. and best of all so far no fluid leaks on my garage floor.:):):)
 

mustanggarage

Active Member
for some reason I could not post yesterday. I tried and all it would let me do was to quote my previous post. anyway since I have not posted on this thread in a while, I wanted to update a bit of my summer fun. I have been driving the car quite a bit this summer. had a good time with it. it runs great. sounds mean, if I mash the throttle it will bark the tires when it shifts into second. I never had an automatic car that would do that before lol. so it is a blast to drive. I also got a new black tonneau for it.


and took it to our local car show. it is still has a 50/50 paint job, but the rest of the car looks good. and I love driving it.


here it is parked between my 65 and my daughters 67. see the sign I had made for her birthday.


My daughters car won first in her class again. I got second with my 65. no trophy for the fox but I did have lots of people who enjoyed it and asked questions about it.


Monday I took the car out for a nice long drive. washed it up nice. filled it with gas and brought it home. put the stabil in the tank. put the battery tender on it, and put the cover on it for the winter. night night sleep tight. see you in the spring.


btw. it looks like I may be starting a new project this winter. after I finish remodeling the basement bathroom that is lol. my Dad hit a deer with his 94 gt 5 speed and smashed the front end up. he just bought a 94 convertible gt that is an automatic so it is easier for him to drive so he just parked the coupe. I decided to buy some parts to start fixing it up. I got a new bumper cover used hood, and new fender. so I will probably start tearing that apart and see if I can get it back in good condition. Dad says since I spent so much money on parts for it he may have to just give it to me (bummer huh) anyway it smells terrible inside because it had some mice in it. but I put dcon in it for a while then brought it in the shop and put it on the lift with the doors open and put dryer sheets in it and sprayed it down several times with fabreeze. I am going to try to clean the carpet and upholstery and see if I can get the smell out of it. if not I will have to replace the carpet too.
 
Last edited:

John2002

Guest
Its always best to park next to other great looking Mustang....I always seem to get stuck next to a yellow Corvette ALAWYS!!! Congtratz on your daughters trophy...Im just going underneath the car this winter...maybe some roll on bed liner where I can reach and thinking about loosing the smog pump and all its plumbing. My last trip was as wash and fill up to but the battery Tender is next.... For cleaning the seats and carpets I bought a spot lifter that sprays water and vacuums it up at the same time. I spray a light mist of Woolite/water and (2 caps full in an old Windex bottle filled with water) let it sit for a few seconds and rince and vacuum it up with the spot lifter...go little sucker...I was amazed the color of the water when I did the carpet in my basement last winter when I pulled out the interior...the guy who had it before me must have never finished drinking a cup of coffee in the car...No big buys off the internet either this year... she's under her cover in the garage waiting for my return...I herniated a disc on 11/18 but didn't it didn't need surgery. I just began PT last week....hopefully 4 more secessions then back to work before Christmas........YEP less the 2 weeks now.....that was on fast year....
 
Top